Using the Batch Load ILT Classes function is a quick way to bulk-load data about facilitated training without individually setting up class sessions, enrolling users, and marking them complete or not. Data is organized in a Microsoft Excel spreadsheet, saved as a tab-delimited file, and uploaded to the learning management system. Changes take place immediately and cannot be undone, although they can be overwritten by a corrected upload.
The following types of data can be imported using this function:
This is often useful when first converting to LMS use, when a large number of class sessions must be set up, or when a significant amount of off-line data must be loaded to the LMS. If enrollment or completion data is not needed by specific class session, use the Batch Course Completion function instead.
When using the Batch Load ILT Classes function, the LMS will always create a new class session and then enroll and/or grant completion to users for the new class session. If the class session has already been created, use the Import Facilitated Sessions Wizard to complete the enrollments or to grant credit.
The learning resource for which data is being loaded must be set up using Maintain Learning Resources, before new class sessions can be created with Batch Load.
The first step in a batch upload of enrollment data is to complete a Batch Upload form. Use Microsoft Excel, or another tool capable of producing CSV (comma separated variable) files to create a data file for uploading batch course completion and enrollment data to the system, or you can access the Batch Upload Template here. The file must be laid out exactly as defined below for the data to be read by the LMS upon upload. One spreadsheet can be used for multiple users and multiple resources. Remember, if this is an Excel spreadsheet, that file must be saved as a .csv file.
All resources and users must already be loaded into the LMS before they can be used on the Batch Upload form.
Columns L-Q are not available in all systems. Columns M-Q are all related to uploading outside learning opportunities.
Use the chart below as a guide to completing the upload form. – All optional fields can be left blank if desired.
| Column | Data | Description |
|---|---|---|
|
A |
Course |
*Required* The title of the learning resource or the resource ID of the course. When provided with a title, the system will try to match the title with one on file. When provided the resource ID, the system will use this value as the unique identifier for the course. Best Practice Tip: Use the resource ID. There is much less room for error using this numerical code than trying to perfectly match up a course title. |
|
B |
Employee ID |
*Required* Participant’s employee number. The username can also be used by placing the ! symbol before the username in this field. |
|
C |
Last Name |
Participant's last name. Optional - this data is not used by the LMS. |
|
D |
First Name |
Participant's first name. Optional - this data is not used by the LMS. |
|
E |
Date |
*Required* Effective date of the completion in MM/DD/YYYY format. The batch upload function is globalized, so if the Administrator’s culture is set for a culture that typically uses the date format of DD/MM/YYYY, then this date format can also be used. If this upload is being used to create an enrollment, a date still must be entered into this field as a placeholder. The date will not show up anywhere in the LMS. |
|
F |
Transaction Type/ Status |
*Required* Enter a single letter code as follows to indicate the desired action: (blank default) or C = "Complete" W = "Waive" E = “Exempt” X = “Enroll” D = "Drop"
For outside learning events only, you may use the following codes: I = “Incomplete” S = “Started” NS = “Not Started”
Note: This field is NOT case sensitive |
|
G |
Time |
The amount of time, in minutes, that will be granted for participation. Optional - If left blank or zero, the system will default to the amount of time that’s specified for the learning resource on the Overview panel of Maintain Learning Resources. |
|
H |
Score |
Optional - The assessment score, if any, associated |
|
I |
Enroll Date |
Optional Effective date of enrollment. If this is a date in the future, the enrollment will not appear on the person's development plan until the specified date. If this field is left blank for an enrollment transaction, the enrollment date will be the date that you uploaded the file. |
|
J |
Required |
Optional Enter a “Y” (for yes) if this is for an enrollment that you would like to appear in the Required section of the user’s Learning Plan. If this field is left blank, the enrollment will be listed in the Elective section. Note: When using this option, the LMS will visibly place the enrollment into the required learning portion of the user’s learning plan. It will not act as a required resource, therefore neither required course notifications will generate, nor will the user’s enrollment appear on a required learning report. This is only available as a backwards compatibility option on some of LearnShare’s older systems. Note: This field is NOT case sensitive |
|
K |
Due Date |
Optional Due Date/Completion Deadline in MM/DD/YYYY format. Any valid date can be used, or leave blank if no date is needed. |
|
L |
Comments |
Optional – Not Available in all systems Free form text box that can be used to enter any comments about this transaction. The entered comments can be viewed on the Manage Credit and Enrollment screen. |
|
M |
Development Goal |
Optional - Not Available in all systems This is a free form text box that can be used to enter the Development Goal for an outside learning entry. |
|
N |
Type of Action |
Optional - Not Available in all systems This is a free form text box that can be used to enter the type of action for an outside learning entry. |
|
O |
Development Action |
Optional - Not Available in all systems This is a free form text box that can be used to enter the Development action for an outside learning entry. |
|
P |
Target Completion Date |
Optional - Not Available in all systems Enter the target completion date for an outside learning entry using the MM/DD/YYYY format. |
|
Q |
Date Started |
Optional - Not Available in all systems Enter the start date for an outside learning entry using the MM/DD/YYYY format. |
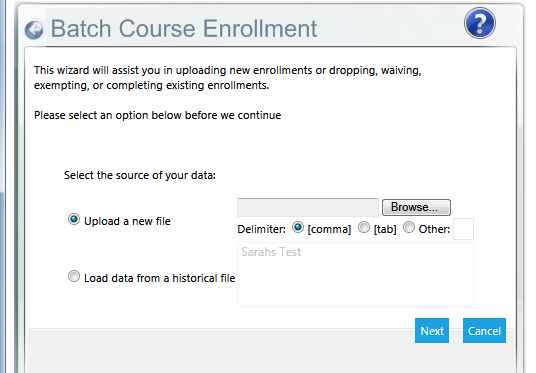
To upload batch enrollment data, go to Wizards > Batch Load Enrollments in the administrative menu. The first screen of the Batch Course Enrollment wizard will open.
Select the Data Source:
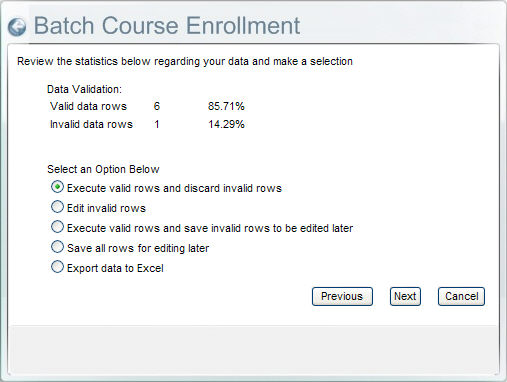
Click Next. The system will scan the file and alert you to invalid data rows. You can then choose what to do about the invalid data.
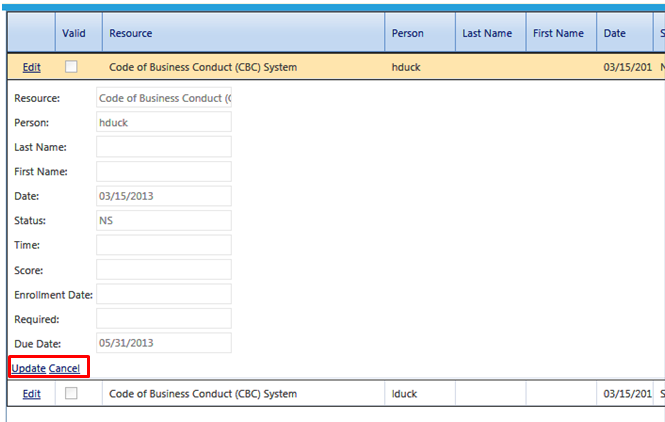
If you choose to edit invalid rows within the Wizard, click the Next button. A window showing the invalid rows of data will open and an Edit link will appear at the far left of each row. When you click the Edit link, the reason for the error will be shown at the bottom of the window and the information on that row will open up in editable field form.
Use the text boxes to edit each incorrect row. When finished editing, scroll down to the bottom of the screen and click the Update link. Or click Cancel to return to the previous screen.